How to make lanterns
A cozy Christmas project
Summer is here and if you haven’t put your tree up, what about some new homemade decor? Do you really want to dig out the same old Christmas decorations from the shed again?
The barbies are firing up, the sun’s shining brighter, and Christmas lights are ready to twinkle as warm evenings roll in. But this year, why not try something a bit different?
Let us show you how to decorate your home beautifully for summer while reducing waste at the same time. Our idea? Magical Christmas lanterns that are not only stunning but make thoughtful, handmade gifts—because nothing beats something made with love.
Now, you might be thinking, “Lanterns out of old tin cans for Christmas? That doesn’t sound very festive.” But hear us out! With a splash of creativity and a trusty paint sprayer, you can turn those plain tins into vibrant works of art. A lick of colourful paint and the glow of a tea light is all it takes to transform them into dazzling Christmas lanterns.
It’s quick, easy, and brings a festive sparkle to your home.
So, why not give it a crack? Add a touch of handmade charm to your celebrations and make this summer season your brightest yet!
A step-by-step guide to upcycling:
Find out here how you can make lanterns and Christmas presents out of old tin cans and paint buckets.
Tools Required
- Paint sprayer – Wood & Metal OR Flexio
- Hammer
- Use the StandardSpray attachment
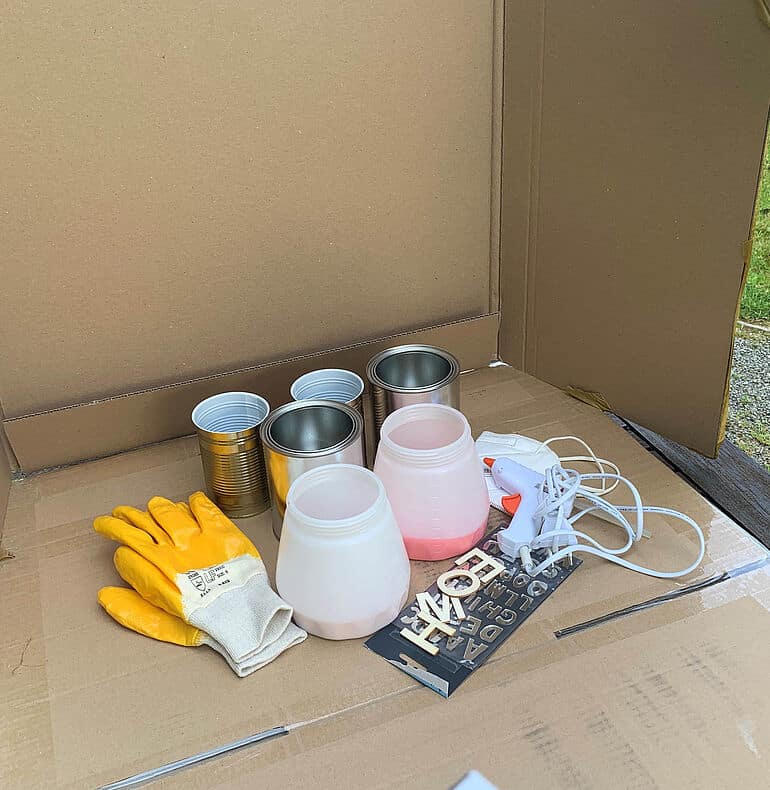
List of materials
- Tins
- Nail
- Pen
- Template
- Adhesive tape
- Paint (colour of your choice)
Resources
- Bottle
- Newspaper
- Parcel tape
- Cardboard
- Tealight
- Gloves
- Mask for spraying
Step 1: Preparing the work surface for hammering
If you use old food tins, first remove the label. It should be possible to remove all adhesive residues completely with warm soapy water.
First of all, use the plastic bottle and the newspaper to make a support structure for the tin can. To do this, wrap the newspaper around the plastic bottle. Now stick this to the table with the parcel tape. You can then put the tin can over it so that it does not slip off the table when they are being hammered.
Place the cardboard under the construction to protection the surface in case you slip with the hammer and nail.
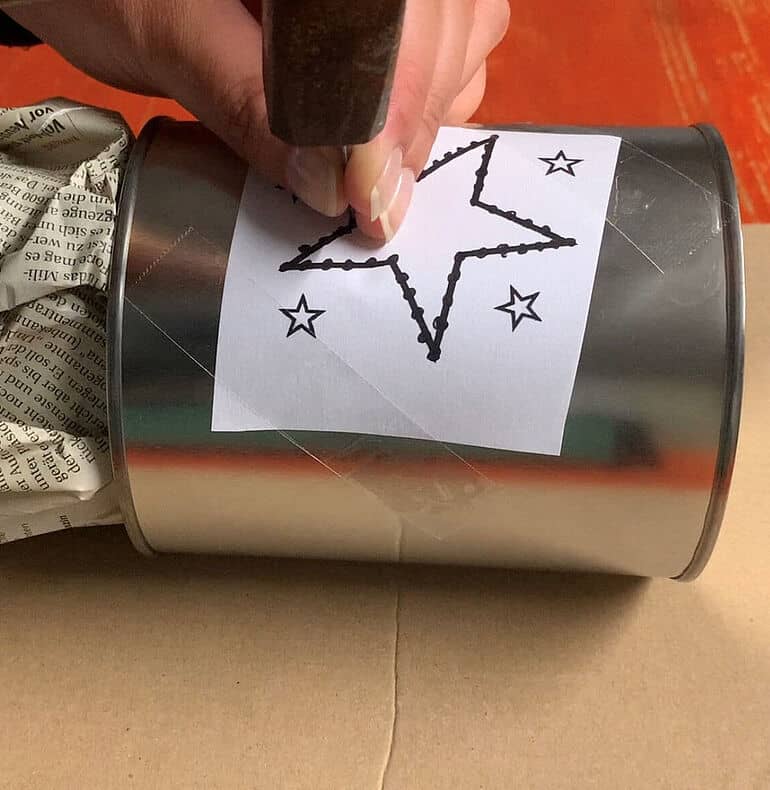
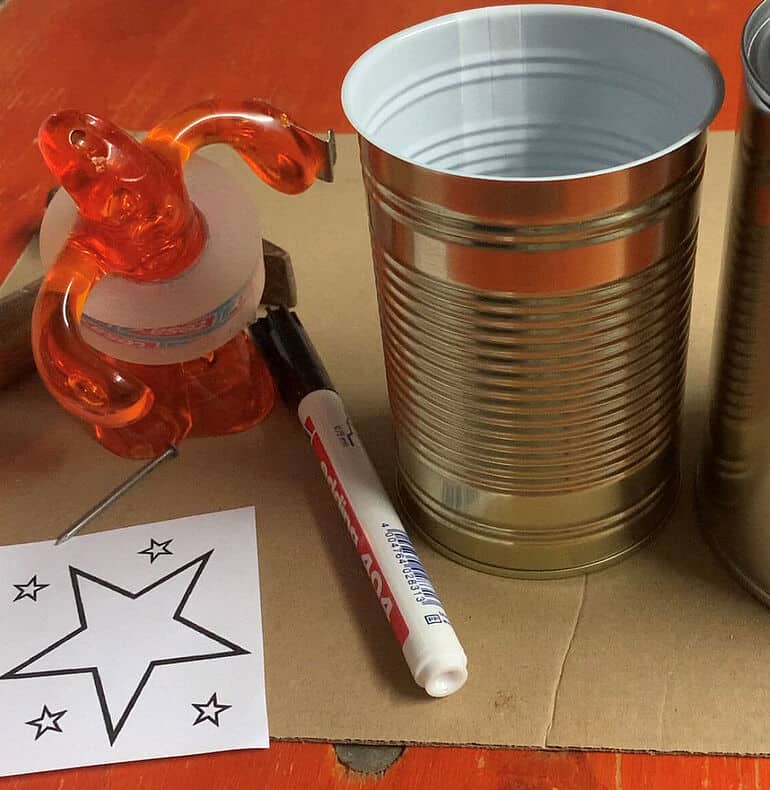
Step 2: Hammering Christmas patterns into the tin can
Draw small dots on your stencil, always following the lines. The dots will show you later where exactly you have to hammer the hole. Now stick the template onto the can using the adhesive tape. Make sure to apply the stencil accurately. Place the nail on the pre-marked point and carefully hit the nail with the hammer, holding it firmly. Then repeat the process until the nail is through the can. Then you can carefully pull the nail out of the hole and line it up with the next dot.
Repeat until the complete pattern has been hammered into the can. At the end, carefully pull off the template. If the can has a few dents, carefully hammer from the inside to remove them.
Step 3: Preparation for spraying the lanterns
As your spray area should remain free from paint, we recommend covering the work table and all other work areas. You can use newspaper, dust sheets or old cardboard for this. We have a little extra tip for you: simply place an extra box at the head of the work surface. This creates a spray chamber and any paint mist will be captured.
Now the colour of your choice can be added to the container after it has been stirred using the stirring stick. You may still need to thin the paint or varnish. You can easily find out by doing a test spray. Use a cardboard box for this. To protect not only your work surface, but also you when spraying, we recommend wearing a respirator mask and gloves as well as safety goggles while working with a sprayer.
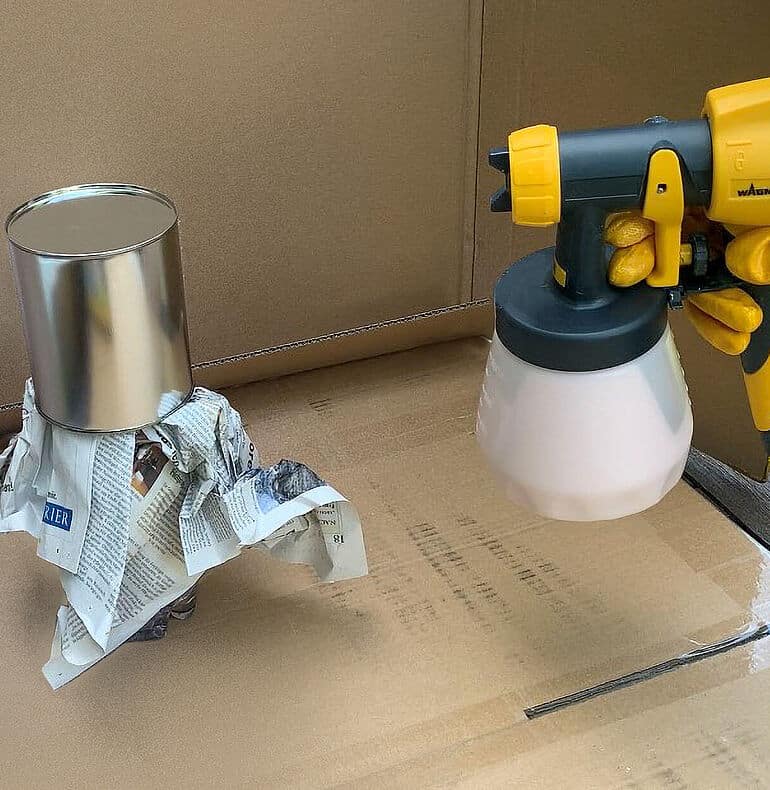
Step 4: Spray the lanterns
Now the most exciting part begins – the spraying! Use the StandardSpray attachment to apply the paint at an even pace and spray at a distance of approx. 20 cm from the can. If you spray too close to the can, paint runs may appear.
Tip: To get a perfect coat of paint without finger marks, simply take a bottle, wrap newspaper around it and put the can over it.
Now let the freshly painted cans dry completely!
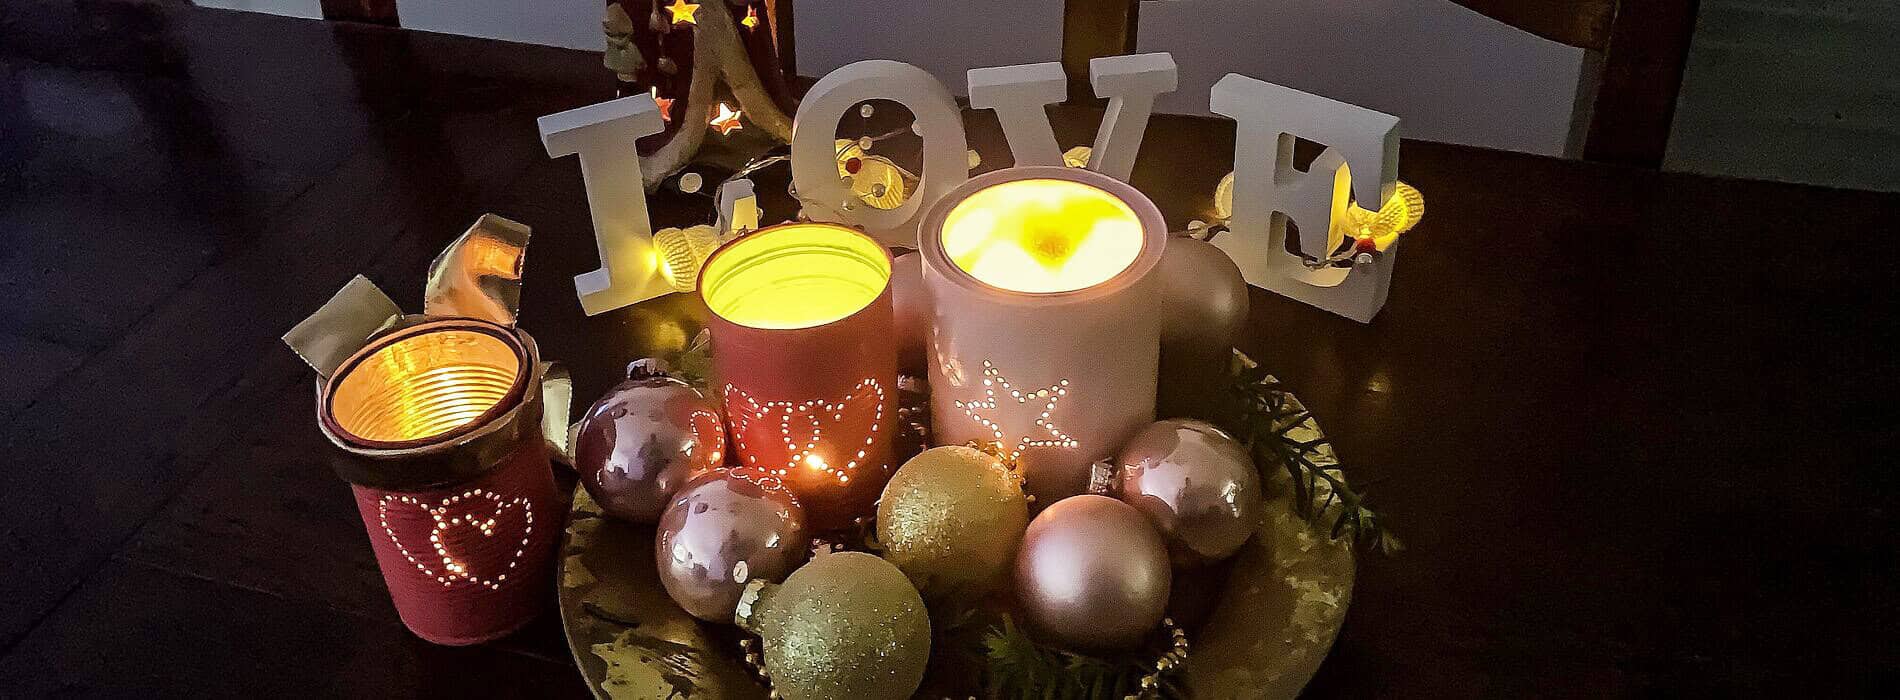
The result
And the home made lanterns are ready. With their cosy lights, the lanterns immerse every room in a dreamy Christmas atmosphere. Get started now and make your living room ready for Christmas.